Home
Home Products
 Contact Us
 Downloads
 Site Map
 Support
Microsoft Office Security SettingsPhone 213-291-1717 or 407-401-9298 (US) or 416-628-1390 (Canada) Online Remote Assistance available free to registered users. Call us to schedule an appointment. Which Version of MS Office am I using?
|
||||
|
Microsoft
Office is locked down (security is set very high) by default. In its default secure
mode, you can create, view and edit Office files but you cannot run
non-Microsoft Office applications. In other words, you must
specifically allow third-party Office applications (such as
BestInspectors.Net apps) to run.
Follow the step-by-step instructions below to allow BestInspectors.Net applications to run. You only need to adjust your settings once for each PC.
|
||||
| Office 2003 | Office 2007 | Office 2010 | Office 2016 (Office 2013 is similar to 2016) |
|
 |
 |
 |
 |
|
|
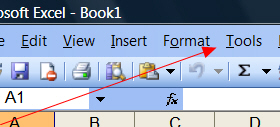
1) Click
on Tools |
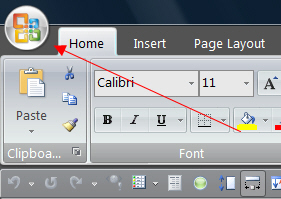
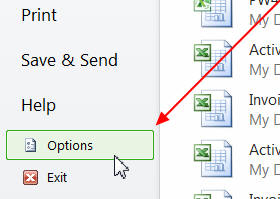
1) Click on the Office
Button |
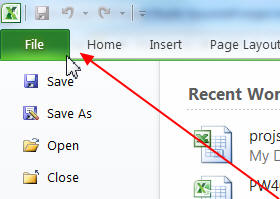
1) Click on the
File tab |
1) Click on the File tab | |
 |
 |
 |
 |
|
|
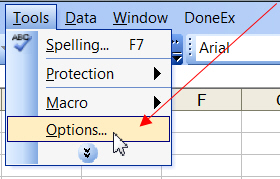
2) Select
Options |
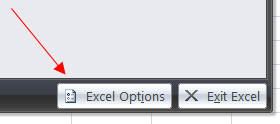
2) Click on the Excel Options button |
2) Click on the Options
Button in the left navigation pane |
2) Click on the Options
Button in the left navigation pane |
|
 |
 |
 |
 |
|
|
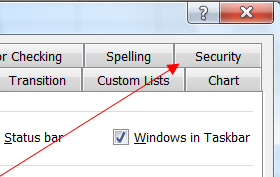
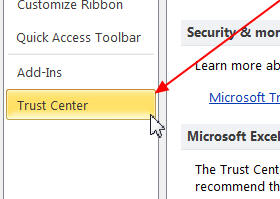
3) Click
on the Security tab |
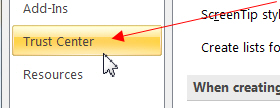
3) Click on the Trust
Center button in the left navigation pane |
3) Click on the Trust
Center button in the left navigation pane |
3) Click on the Trust
Center button in the left navigation pane |
|
 |
 |
 |
 |
|
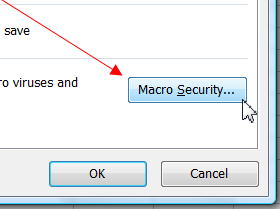
| 4) Click on the Macro Security button |
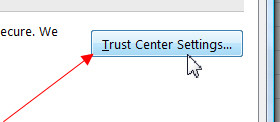
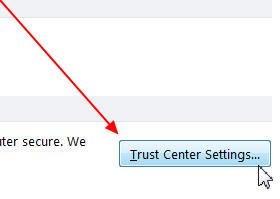
4) Click on the Trust
Center Settings button |
4) Click on the Trust
Center Settings button |
4) Click on the Trust Center Settings button | |
 |
 |
 |
 |
|
|
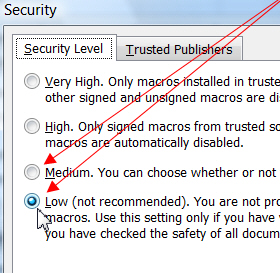
5) Click
on either Medium or Low We recommend Low. If you select Medium, you will be asked whether you want to run the program each time you start it. |
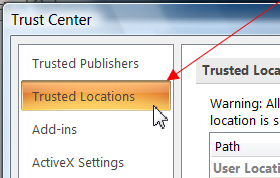
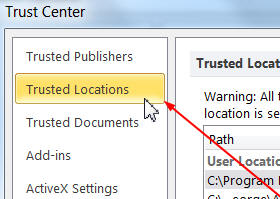
5) Click on the Trusted
Locations button in the left navigation pane |
5) Click on the Trusted
Locations button in the left navigation pane |
5) Click on the Trusted
Locations button in the left navigation pane |
|
 |
 |
 |
 |
|
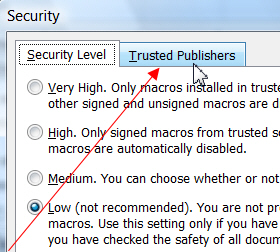
| 6) Click on the Trusted Publishers tab |
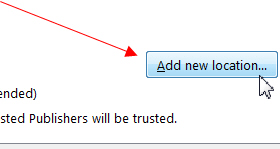
6) Click on the Add New
Location button |
6) Click on the Add New
Location button |
6) Click on the Add New Location button | |
 |
 |
 |
 |
|
|
7) Check BOTH
checkboxes |
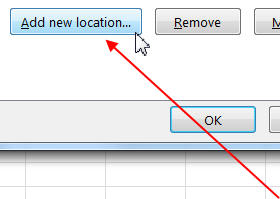
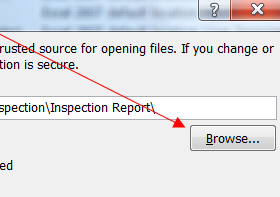
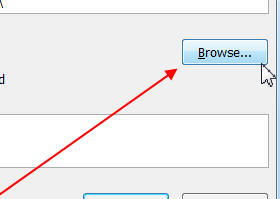
7) Click on the Browse
button then browse to the installation folder that you chose during the installation |
7) Click on the Browse
button then browse to the installation folder |
7) Click on the Browse
button then browse to the installation folder |
|
 |
 |
 |
 |
|
|
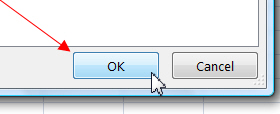
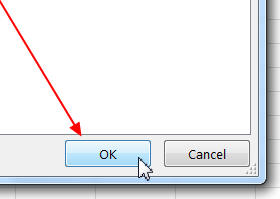
8) Click the OK button |
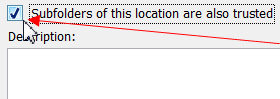
8) Check the
Subfolders checkbox |
8) Check the
Subfolders checkbox |
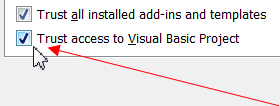
8) Click "Enable all
macros" then Check "Trust Access to the VBA ..." |
|
 |
 |
 |
 |
|
|
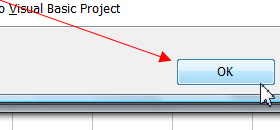
9) Click the last OK
button |
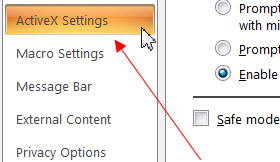
9) Click on the ActiveX
button in the left navigation pane |
9) Click on the
OK
button |
9)
Select External Content then Select "Enable all Data Connections" then Select "Enable Automatic Updates ... " |
|
 |
 |
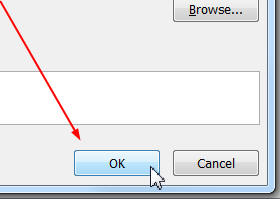
10) Click on the OK buttons until you have exited |
||
|
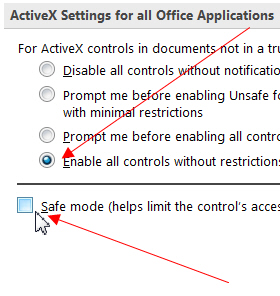
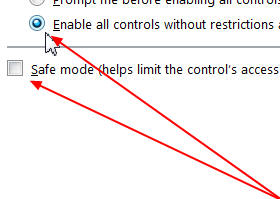
10) Select "Enable all
controls" then 11) UNcheck "Safe mode"
|
10) Click on the ActiveX
button in the left navigation pane |
|||
 |
 |
|||
|
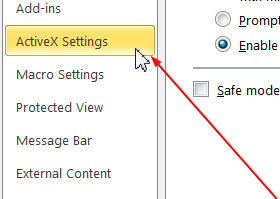
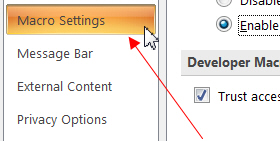
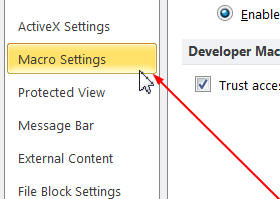
12) Click on the Macro
Settings button in the left navigation pane |
11) Select "Enable all
controls" then 12) UNcheck "Safe mode"
|
|||
 |
 |
|||
|
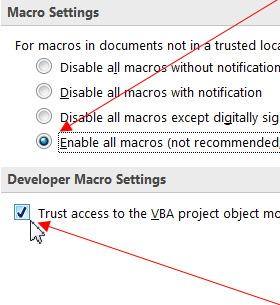
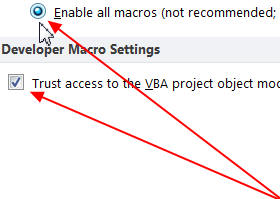
13) Click "Enable all
macros" then 14) Check "Trust Access to the VBA ..."
|
13) Click on the Macro
Settings button in the left navigation pane |
|||
 |
 |
|||
|
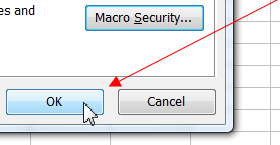
14) Click the OK button |
14) Click "Enable all
macros" then 15) Check "Trust Access to the VBA ..." |
|||
 |
 |
|||
| 15) Click the last OK button |
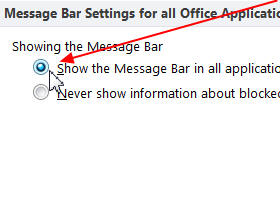
16) Click on the Message
Bar button in the left navigation pane |
|||
 |
||||
|
17) Select
"Show the Message Bar ..." |
||||
 |
||||
|
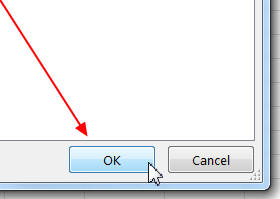
18) Click the OK button |
||||
 |
||||
|
19) Click the last OK
button |
||||
|
After you complete the above steps, completely close and reopen all Office applications.
|
||||